Wie können wir helfen?
Updating the operation system
It is a good idea to update your system regularly. Assuming something could change from time the distribution was released, we need to update the system after first start.
yumis the powerful and standard package manager for CentOS Linux. I recommend using it everytime you are installing or deinstalling software, because it keeps a reliable journal of all installations and can automatically resolve all dependencies when you install or deinstall software.
So, to make your system up-to-date execute this:
yum upgrade -y
Now we are ready to install software.
Installing prerequisites and some useful utils
To install some pre-requisites useful software crucial for comfortable usage of your system, execute these commands:
yum install java-1.8.0-openjdk.x86_64 java-1.8.0-openjdk-devel.x86_64 mc net-tools.x86_64 htop iotop iftop unzip wget epel-release -y
yum install rlwrap -y
A few words about the packages installed:
java-1.8.0-openjdk.x86_64andjava-1.8.0-openjdk-devel.x86_64are Java 8 Development Kit packages, which are needed for Tomcat and ORDS to operate.
Installing Java from official repository using
yumshould set all the needed environment variables. But you can check it by executing the commandjava -versionand if it works, everything is ok. But if not, then correctly set the$PATHand$JAVA_HOMEvariables.
mc– Midnight Commander – a really powerful file manager similar to Norton Commander or FAR Manager.net-tools.x86_64– useful and customary network utilities such asifconfigandnetstat. The thing is in CentOS 7 they replaced these usual utilities withipandsscommands, so to be able to useifconfigit should be installed manually.htop– a very good alternative to standardtoputility. It is much more powerful and can be flexibly configured.iotop– input/output read/write monitoring utility. Very useful to check disk problems when using a database.iftop– an utility to monitor network bandwidth.unzip– unzip utility.wget– a command-line utility to fetch files from the remote source (HTTP or FTP-host for example).epel-release– an additional repository for CentOS with loads of useful software, called EPEL (stands for Extra Packages for Enterprise Linux).rlwrap– a command-line wrapper utility, irreplaceable thing when it comes to usesqlpluson Linux. Always userlwrap sqlplusinstead of justsqlplusto see the difference. These utils installs from EPEL repository.
Initial system configuration
Network time synchronization
There’s an utility called chrony for this purpose in the minimal CentOS installation:
systemctl start chronyd
systemctl enable chronyd
Disabling SELinux on CentOS 7
Now, we need to disable selinux. Its configuration and usage is a topic for a different series of blog posts, so here we’ll just omit all this.
Type this command:
mcedit /etc/sysconfig/selinux
And change the value SELINUX=enforcing to SELINUX=disabled, then save the config file. After doing this, execute this to disable selinux in the runtime:
setenforce 0
Configuring the firewall
CentOS 7 uses firewalld as a main firewall service, which is an additional abstraction level above iptables. In many other guides you could see people disabling it and returning to use iptables directly. I don’t know why, maybe because it always hard to pick up something new. And so, I tried, and really liked firewalld ease of configuration (especially in comparison to iptables if you’re new to it).
To configure the firewall, we are going to do these things:
- Add a new service called
oracle-db. - Set the new service description and add the port to it.
- Enable such services as
http,httpsandoracle-xefor the default zonepublic. - Reload firewall list of rules on-the-fly.
To do this all, execute the commands below:
firewall-cmd --permanent --new-service=oracle-db
firewall-cmd --permanent --service=oracle-db --set-short="Oracle Database Listener" --add-port=1521/tcp
firewall-cmd --permanent --zone=public --add-service=http
firewall-cmd --permanent --zone=public --add-service=https
firewall-cmd --permanent --zone=public --add-service=oracle-db
firewall-cmd --reload
Now we are ready to install the Apache Tomcat and httpd.
Installing of Apache Tomcat and Apache httpd
To install both the application and the web server we will be using yum, because it is the safest and the easiest way I know so far. You’re still able to manually download and install them, but this is not the aim of this guide. Only one thing here – it is assumed that you have completed all the steps from above (installing JDK in particular) before proceeding with the installation.
So, in order to install Tomcat and httpd run this:
yum install tomcat httpd -y
This will install Tomcat 7 and Apache httpd 2.4 on your system. The 7th version of Tomcat is more than enough for us. Then, to start the services and to start them on startup, let’s do the next:
systemctl start tomcat
systemctl enable tomcat
systemctl start httpd
systemctl enable httpd
That’s it! By now both Tomcat and httpd should work on your system and should listen ports 8080 and 80 respectively on your server. Note the fact that we intentionally didn’t open port 8080 on our server, because we are not going to use it. Instead, httpd will reverse proxy all requests to Tomcat using AJP protocol listener on port 8009.
You even may disable the HTTP connector on port 8080 in Tomcat’s
server.xmlconfig (this is very optional). I will not tell you how to do this, consider it an exercise. Do not forget to restart the Tomcat service afterwards in case you already opened yourmcfile manager.
Downloading the software
The first thing to do here is to download the software from Oracle Technology Network:
- Database/Database Technology Index/Database Express Edition/Downloads – you will need the package for Linux x64 and the preinstall RPM package (for release 7 of RHEL or CentOS) from there.
- Developer Tools/Oracle REST Data Services/Downloads
- Developer Tools/Application Express/Downloads
You have to have an ODC account (you can register right there, it is free) and accept the license agreement before you can start to download the stuff.
In case you have downloaded all the the software on your desktop computer, you will need to upload it to your server. It could be done by leveraging of an SCP or SFTP client, for instance pscp or WinSCP if you’re a Windows user.
After everything is done I am assuming all the downloaded Oracle software is on your server in the
rootuser home directory, which is usually/root.
Installation of Oracle Database 18c XE
Before we start, I just want you to be reminded about the minimum system requirements for the installation:
- 1GB RAM (2GB is strongly recommended)
- 2GB swap
- 10GB of disk space
Installation of RDBMS
After you checked them, to install the RDBMS, you need to install the preinstall RPM package first and then install the database software as following:
cd /root
# uncomment the next line to download the preinstall package in case you have not downloaded it from the OTN
# wget https://yum.oracle.com/repo/OracleLinux/OL7/latest/x86_64/getPackage/oracle-database-preinstall-18c-1.0-1.el7.x86_64.rpm
yum localinstall oracle-database-preinstall-18c* -y
yum localinstall oracle-database-xe-18c* -y
Notice that I used yum to install the local packages instead of rpm. This will enable us to use all the power of yum in the future if needed (for example, to remove a package with its dependencies).
The user oracle and the group oinstall (not dba as it was previously) are created during the package installation, so we do not need to create them explicitly. Also, the default user environment is created during the set up process (so we do not have to do it explicitly as it was previously). If you like, you can set a password for this user by invoking passwd oracle command. This user is the owner of the /opt/oracle directory where the Oracle Database is located and this must stay unchanged.
Now, when the packages are installed and the user is set up, you need to run the initial database configuration script:
/etc/init.d/oracle-xe-18c configure
And answer the questions prompted. After answering all the questions, it is going to take several minutes to initialize the database.
Setting up environment
Now it is a good idea to set up Oracle Database environment variables in order to make users be able to use sqlplus from anywhere. Along with this, we are setting up some useful aliases:
echo '# setting oracle database environment variables and aliases' >> /etc/profile.d/oraenv.sh
echo 'ORACLE_SID=XE' >> /etc/profile.d/oraenv.sh
echo 'ORAENV_ASK=NO' >> /etc/profile.d/oraenv.sh
echo '. /usr/local/bin/oraenv -s' >> /etc/profile.d/oraenv.sh
echo 'alias sqlplus="rlwrap sqlplus"' >> /etc/profile.d/oraenv.sh
echo 'alias rman="rlwrap rman"' >> /etc/profile.d/oraenv.sh
. /etc/profile.d/oraenv.sh
Then enable Oracle Database 18c XE service for automatic startup:
systemctl enable oracle-xe-18c
Note that CentOS 7 uses
systemdinstead ofsysconfigto run system services, hence you should also stop and start theoracle-xe-18cservice usingsystemctlinstead of usinglsnrctlcommand. Otherwise, you are risking to find yourself with the listener not working properly.
Connecting to database
And we are ready to log into the database and check if everything is good:
sqlplus /nolog
-- connect to the database
SQL> connect sys as sysdba

-- basic query to check if everything works
SQL> select * from dual;

-- check components and their versions
SQL> select comp_id, version, status from dba_registry;

SQL> exit
That is it! By now we have successfully installed the XE instance and it is up and running.
Note that since 12c Oracle Database has multitenant architecture, which means there could be several pluggable databases and one multitenant container database. By default, the
XEPDB1pluggable database is created during the installation of XE.
To make it easier to connect to the pluggable database, I recommend editing of tnsnames.ora file and add there a new connection descriptor that we are going to use:
mcedit /opt/oracle/product/18c/dbhomeXE/network/admin/tnsnames.ora
Add this record there below the standard XE record:
 PDB1 =
  (DESCRIPTION =
    (ADDRESS = (PROTOCOL = TCP)(HOST = localhost)(PORT = 1521))
    (CONNECT_DATA =
      (SERVER = DEDICATED)
      (SERVICE_NAME = XEPDB1)
    )
  )
And save the changes.
Installation of the latest version of APEX
Previously installation process of the latest version of Oracle Application Express (also known as APEX) consisted of deinstalling of the previous version and then installing of a new version. In 18c Oracle stopped to ship the Express Edition of their RDBMS with APEX preinstalled. So the step to deinstall the preinstalled version od APEX is not needed anymore.
Another difference will be in the fact that we are going to utilize the multitenant architecture of the 18c XE and will be installing our environment into the pluggable database. This enables us to potentially have different versions of APEX installed into different PDBs.
So now the installation process roughly consists of unzipping of the downloaded archive with the freshest version of APEX, connecting to the PDB, running a few installation scripts and then copying static files to your web server directory.
Installation of current version of APEX
So let’s get it started. Change your directory back to /root, unzip the APEX archive and make the user oracle the owner of the directory. Considering we are installing the 18.2 version of APEX, it would look like this:
cd /root
mkdir -p /opt/oracle/apex
unzip apex_18.*.zip -d /opt/oracle
chown -R oracle:oinstall /opt/oracle/apex
Note that we will be installing the full development environment of APEX. This could be converted to a runtime only environment if needed. Refer to the official documentation for this. The full development environment should be used only when the Application Builder is needed. On a production environment it is strongly recommended to choose the runtime only setup.
From the APEX new home directory connect to our pluggable database as sysdba and run the installation scripts (we will be using SYSAUX schema for APEX metadata):
cd /opt/oracle/apex
-- connect to the database
sqlplus sys@pdb1 as sysdba

-- run the script to install a full development environment
SQL> @apexins.sql SYSAUX SYSAUX TEMP /i/

 -- create an instance administrator user and set their password
SQL> @apxchpwd.sql

-- configure REST Data Services (needed for ORDS to serve workspaces and applications static files)
SQL> @apex_rest_config.sql

-- disable embedded PL/SQL gateways
SQL> exec dbms_xdb.sethttpport(0);
SQL> exec dbms_xdb.setftpport(0);

-- unlock and set up APEX public user, this is needed for ORDS to be able to connect to APEX engine
SQL> alter user apex_public_user account unlock;
SQL> alter user apex_public_user identified by "APEX_PUBLIC_USER";

-- add ACL to enable outgoing connections for APEX internal user
-- this is needed for the APEX_EXEC and APEX_WEB_SERVICE APIs to function properly
-- change it for a more strict policy if needed
SQL> begin
    dbms_network_acl_admin.append_host_ace(
        host => '*',
        ace => xs$ace_type(
            privilege_list => xs$name_list('connect'),
            principal_name => 'APEX_180200',
            principal_type => xs_acl.ptype_db))
        ;
end;
/

-- now disconnect from the database
SQL> exit
Then we need to copy APEX static files (images, stylesheets, JS files and so on) to the web server directory:
mkdir -p /var/www/apex/images
cp -a /opt/oracle/apex/images/. /var/www/apex/images
Now we finished with the Application Express installation.
Installation of ORDS
The Oracle Rest Data Services (ORDS) installation consists of unzipping the downloaded archive, running the configuration command, and then deploying the ords.war file into the Tomcat webapps folder.
Change back your directory to /root and unzip the ORDS archive:
cd /root
mkdir -p /opt/oracle/ords
unzip ords-18.*.zip -d /opt/oracle/ords
Run the ORDS configuration command before deployment. Choose the advanced mode – in this case the installation process will be interactive:
cd /opt/oracle/ords
java -jar ords.war install advanced
When prompted for ORDS configuration directory (the first question), enter config. Then provide the connection info to your pluggable database (specify XEPDB1 for the service name).
Note that we specified
XEPDB1here, notPDB1, because ORDS needs the service name, not yourTNSNAMESentry by default to connect to your database. However, when you complete the installation, you can change ORDS settings to use TNS as the connection method. Find out how in the official documentation.
Note that „RESTful Services“ are required by APEX 5 and above, so enable this by specifying passwords for the
APEX_LISTENERandAPEX_REST_PUBLIC_USERwhen prompted.
After the configuration is completed, the values are saved in opt/oracle/ords/config/ords/defaults.xml file and may be modified there. You can find more information about possible ORDS configuration options in the official documentation.
The tomcat user (created as part of Tomcat install) must have read-write access to the ORDS configuration folder:
chown -R tomcat:tomcat /opt/oracle/ords/config
Now it’s high time to deploy ORDS to Tomcat application server. Copy the ords.war into the Tomcat webapps directory for this (and we will restart the Tomcat service later):
cp -a /opt/oracle/ords/ords.war /usr/share/tomcat/webapps/
Done! We succeeded in installing of ORDS and deploying it to Tomcat by now. Only one step is left.
Configuration of Apache httpd to map HTTP requests to ORDS
The last, but not the least step in this part of the guide is to configure Apache httpd to map HTTP-requests to ORDS and therefore APEX engine.
For this, add a custom httpd configuration file. By default, every .conf file placed in the etc/httpd/conf.d/ directory is read by httpd as an additional configuration file to the main /etc/httpd/conf/httpd.conf config file.
Note that these additional config files are read and processed by
httpdin alphabetical order, so name your custom config accordingly if you use multiple config files.
So, let’s create the 10-apex.conf file in the etc/httpd/conf.d/ directory with the contents as below:
# additional apache httpd configuration for apex requests proxying
# add this to the end of /etc/httpd/conf/httpd.conf
# or put it in a separate file such as /etc/httpd/conf.d/10-apex.conf

# forward ORDS requests to tomcat
<VirtualHost *:80>
    # uncomment the lines below if you plan to serve different domains
    # on this web server, don't forget to change the domain name
    # ServerName yourdomain.tld
    # ServerAlias www.yourdomain.tld

    # alias for APEX static files
    Alias "/i" "/var/www/apex/images/"

    # uncomment the line below if you want
    # to redirect traffic to ORDS from root path
    # RedirectMatch permanent "^/$" "/ords"

    # proxy ORDS requests to tomcat
    ProxyRequests off
    <Location "/ords">
        ProxyPass "ajp://localhost:8009/ords"
        ProxyPassReverse "ajp://localhost:8009/ords"
    </Location>
</VirtualHost>
Now you are ready to save the configuration file and restart the services.
Restarting of the services
In order for changes to take effect, we need to restart the services:
systemctl restart httpd
systemctl restart tomcat
And finally, you’re ready to access APEX from your web browser using a link like http://yourdomain.tld/ords (or http://yourdomain.tld in case you switched on force redirection), where yourdomain.tld is the domain name or the IP-address of your server.
In case you’re facing the situation when ORDS does not map APEX application and workspace static files properly after its installation (I mean, APEX engine static files work fine, but images, style sheets and other files from your applications generate the 404 not found error), try validating of the ORDS installation (and then restart the
tomcatservice):
cd /usr/share/tomcat/webapps/
java -jar ords.war validate
systemctl restart tomcat
SSHd tweaks
It is a good idea to disable direct remote root login. Users which need super user rights, should be able to escalate their rights instead using su command. To do so, edit the SSHd config and reload it:
mcedit /etc/ssh/sshd_config
Add a line as below to the config and save the file
PermitRootLogin no
Then, restart the service:
systemctl restart sshd
Apache httpd tweaks
First, disable the default welcome page by removing the corresponding config file:
rm -rf /etc/httpd/conf.d/welcome.conf
Then, add an additional configuration file 0-extra.conf in the etc/httpd/conf.d/ directory with the contents as below:
# additional apache httpd configuration
# add this to the end of /etc/httpd/conf/httpd.conf
# or put it in a separate file such as /etc/httpd/conf.d/0-extra.conf

# disable sensitive version info
ServerSignature Off
ServerTokens Prod

# enable compression of static content
<IfModule deflate_module>
     SetOutputFilter DEFLATE
     AddOutputFilterByType DEFLATE text/plain text/html text/xml text/css text/javascript
</IfModule>

# enable client caching of static content
<IfModule expires_module>
    ExpiresActive On
    ExpiresByType image/gif "access plus 7 days"
    ExpiresByType image/jpeg "access plus 7 days"
    ExpiresByType image/png "access plus 7 days"
    ExpiresByType text/css "access plus 7 days"
    ExpiresByType text/javascript "access plus 7 days"
    ExpiresByType application/javascript "access plus 7 days"
    ExpiresByType application/x-javascript "access plus 7 days"
</IfModule>
This will enable traffic compression and client-side static files caching. On the other hand, it will disable displaying of the sensitive version data.
Tomcat tweaks
If you followed the steps from this guide, there’s nothing to clean up in Tomcat. But, just to be sure, you can execute these command which are intended to remove all default Tomcat applications:
cd /usr/share/tomcat/webapps
rm -rf examples/*
rmdir examples
rm -rf sample/*
rmdir sample
Then, I noticed that despite the fact both tomcat and oracle-xe-18c start on the system startup, APEX does not properly work without restarting of tomcat. This happens because the tomcat service starts before the oracle-xe-18c. To fix this, we need to edit the Tomcat service systemd unit file:
mcedit /usr/lib/systemd/system/tomcat.service
There the Unit section should look like this:
[Unit]
Description=Apache Tomcat Web Application Container
After=syslog.target network.target oracle-xe-18c.service
Wants=oracle-xe-18c.service
Save the file after making changes and invoke this command to reload the config:
systemctl daemon-reload
Oracle XE tweaks
Now let’s connect to the database using sqlplus /nolog command, clean it up and make some additional configuration. Notice the fact that we are going to use bequeath connection here, because we will need to restart the database instance once:
-- connect to the CDB database to perform system-wide configuration
connect sys as sysdba

-- memory parameters for the instance
-- notice the fact that we are using the maximum allowed memory size for XE
-- so, please, tweak these values in case you do not have such amounts of memory for the RDBMS (otherwise, your instance won't start)
-- also notice that we are using AMM (Automatic Memory Management)
alter system set memory_target=2G scope=spfile;
alter system set memory_max_target=2G scope=spfile;
alter system set sga_target=0 scope=spfile;
alter system set pga_aggregate_target=0 scope=spfile;

-- some recommended values for the maximum number of sessions, processes and job_queues
alter system set sessions=250 scope=spfile;
alter system set processes=500 scope=spfile;
alter system set job_queue_processes=100 scope=spfile;

-- restart database
shutdown immediate
startup

-- now change session to use PDB to configure other things
alter session set container = xepdb1;

-- anonymous user is not needed when we don't use XDB
alter user anonymous account lock;

-- dropping the demo schema
drop user hr cascade;

-- altering the default password policy (by default passwords will expire in 180 days)
alter profile default limit password_life_time unlimited;

-- creating a tablespace for our APEX workspaces
create tablespace apex datafile '/opt/oracle/oradata/XE/XEPDB1/apex.dbf' size 128M reuse autoextend on next 8M maxsize unlimited;

-- creating a schema for our APEX workspaces
create user apex identified by "YourPasswordHere" default tablespace apex temporary tablespace temp;
alter user apex quota unlimited on apex;
grant unlimited tablespace to apex;
grant create session to apex;
grant create cluster to apex;
grant create dimension to apex;
grant create indextype to apex;
grant create job to apex;
grant create materialized view to apex;
grant create operator to apex;
grant create procedure to apex;
grant create sequence to apex;
grant create snapshot to apex;
grant create synonym to apex;
grant create table to apex;
grant create trigger to apex;
grant create type to apex;
grant create view to apex;

exit
As you can see, I created a new schema apex in a new tablespace apex. I would recommend to use it for your APEX applications.
ORDS tweaks
The default connection pool settings in the ORDS configuration are too small. You’ll have to experiment to see what settings are the best for your workload, but the following seem to work well:
mcedit /opt/oracle/ords/config/ords/conf/apex.xml
Find these parameters and set their values (or add these lines if they do not exist):
<entry key="jdbc.InitialLimit">10</entry>
<entry key="jdbc.MinLimit">10</entry>
<entry key="jdbc.MaxLimit">60</entry>
Restart Tomcat to take effect:
systemctl restart tomcat
Checking if everything works
I believe you are dying to open your browser and check how it works. Just do it!
APEX main page must be available on yourdomain.tld/ords address, APEX administration services on yourdomain.tld/ords/apex_admin respectively (where yourdomain.tld is your domain name or the server IP address)
Configuring SSL
In previous chapters we already got rid of unneeded Tomcat applications and tweaked Apache configuration a little bit. But we didn’t touch a huge topic of secure connections between users and your web server. I should warn you that configuring this is going to be more advanced than anything we already did before. But it’s worth it, because we are talking about security and you shouldn’t underestimate it.
So, the first thing to say here – you will need an SSL certificate to set up a secure access to your APEX applications. Such a certificate is issued for a domain name, which you have to possess. Keeping all this in mind we are ready to start.
I should also notice that we are not going to use Oracle Wallet, because our security layer will only take place between our users and the web server, which is Apache httpd in our case.
SSL certificates are generally issued by trusted companies and in most cases this is a paid service. But thanks to Linux Foundation, today we have a totally free option of Let’s Encrypt certificates. They are issued for 60 days and are free to renew. There is also very useful software which automates generation and renewal processes of such certificates, it is called certbot and it is available for a variety of operating systems, including CentOS Linux. I will not stop on how to install certbot, because Digital Ocean already composed a detailed tutorial on the topic. And you will need to install certbot using this tutorial. Additionally, you are going to find there information about how to configure automatic renewal of your certificates.
Note that during installation,
certbotaddsssl.conffile to the/etc/httpd/conf.ddirectory, which already contains needed HTTPS configuration for Apache (enabling listening to port 443, proper cipher suite and so on).
Assuming that you succeeded with installation of certbot and generated your certificates following the steps in the manual, the only thing which left is to rewrite our APEX virtual host configuration and restart Apache service.
So, open your 10-apex.conf file in the /etc/httpd/conf.d/ directory (we created it in the second chapter of this guide) and rewrite its contents as following:
# force HTTPS
<VirtualHost *:80>
    ServerName yourdomain.tld
    ServerAlias www.yourdomain.tld

    RewriteEngine on
    RewriteCond %{SERVER_NAME} =www.yourdomain.tld [OR]
    RewriteCond %{SERVER_NAME} =yourdomain.tld
    RewriteRule ^ https://%{SERVER_NAME}%{REQUEST_URI} [END,NE,R=permanent]
</VirtualHost>

# forward ORDS requests to tomcat
<VirtualHost *:443>
    ServerName yourdomain.tld
    ServerAlias www.yourdomain.tld

    # SSL certificates settings
    Include /etc/letsencrypt/options-ssl-apache.conf
    SSLCertificateFile /etc/letsencrypt/live/yourdomain.tld/cert.pem
    SSLCertificateKeyFile /etc/letsencrypt/live/yourdomain.tld/privkey.pem
    SSLCertificateChainFile /etc/letsencrypt/live/yourdomain.tld/chain.pem

    # alias for apex static files
    Alias "/i/" "/var/www/apex/images/"

    # uncomment the line below if you want
    # to redirect traffic to ORDS from root path
    # RedirectMatch permanent "^/$" "/ords"

    # proxy ORDS requests to tomcat
    ProxyRequests off
    ProxyPreserveHost On
    <Location "/ords">
        ProxyPass "ajp://localhost:8009/ords"
        ProxyPassReverse "ajp://localhost:8009/ords"
    </Location>
</VirtualHost>
Where yourdomain.tld is your domain name. This time this is mandatory to specify one, because your SSL certificates are issued for a particular domain.
Then, as you see, we now have two virtual hosts in the configuration. The first is for the HTTP endpoint, and it only forces usage of HTTPS by leveraging of power of mod_rewrite. The other is for the HTTPS endpoint which looks pretty similar to the configuration we used to have before, the only difference is that it now uses our Let’s Encrypt certificates (mind the paths, they should be changed).
Now save the changes and restart the Apache service:
systemctl restart httpd
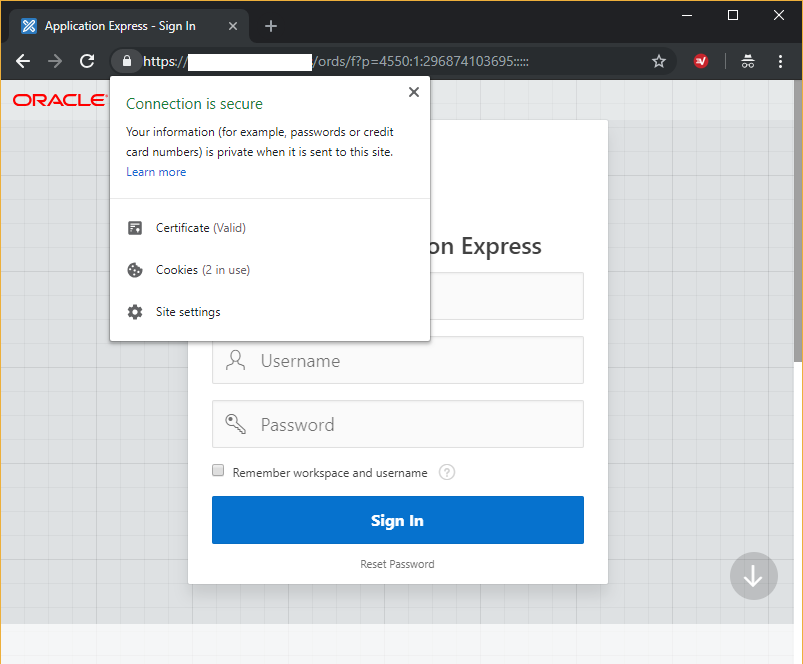
That’s it! By now you should be able to access your APEX applications using HTTPS protocol. No SSL configuration needed for Tomcat, ORDS or Oracle Database itself.
Making it indestructible
As you already know, APEX engine and applications metadata reside in the database. So, making your APEX environment reliable and fault tolerant basically means securing the database underneath.
And Oracle Database has quite many options here. However, not everything depends only on the RDBMS, because it is meaningless to try to achieve high degree of reliability if everything is you have is a single physical drive.
To make our environment more fault tolerant, we are going to configure two main things – redundancy and backups. Redundancy basically means having more than one copies of files, critical for database functionality, which would save our nerves if one of the copies gets corrupted. Backups, in their turn, would make it possible to restore and recover lost data in case of more severe media failure.
It is important to say that different copies of critical database files should reside on different physical drives. But these drives should be local to the database, since database constantly write there and performance of your instance depend on this.
Archived REDO logs and backups should also be placed on a physical drive different from the one where your datafiles are, but it is even better to place them on a different host. You can sacrifice performance here, because archiving and backing up processed do not affect your applications response time. For instance, you could attach an NFS or iSCSI volume to your system and use it in a transparent way like a local hard drive, whereas it would physically reside somewhere else.
There are other things, which you can have a look at in the official Oracle Administration guide. But even these two main steps done properly would make your database almost indestructible.
Setting up redundancy
By default Oracle Database 18c has this configuration in CentOS Linux:
- Two copies of control files under
oradatadirectory. - Three groups of one redo log file each.
NOARCHIVELOGmode.
We are going to multiplex the control files to a different drive, add there a member to each redo log group and then enable ARCHIVELOG mode.
Preparing directories
Our datafiles, redo log and control files reside in /opt/oracle/oradata directory by default. Assuming the fact that our second physical drive is mounted to /var/media, let’s prepare a directory for copies of our critical database files:
mkdir -p /var/media/oracle/oradata/XE
chown -R oracle:oinstall /var/media/oracle
Notice the fact that I followed the default directory structure, which we have for the main location, but this is totally optional. I also gave ownership of the new directory to user oracle, because it needs full permissions on it.
Multiplexing control files
Official documentation recommends to have at least two copies of database control files, each stored on a different physical disk. Location of control files is stored in the server parameter file (or SPFILE), but this file must not be edited manually.
First, set the new paths by changing the corresponding instance parameter. For this, run sqlplus /nolog and connect to the database as sys.
-- connect as user SYS using bequeath method and enter your password
connect sys as sysdba
-- set the new value of the 'control_files' parameter
alter system set control_files='/opt/oracle/oradata/XE/control01.ctl','/opt/oracle/oradata/XE/control02.ctl','/var/media/oracle/oradata/XE/control01.ctl','/var/media/oracle/oradata/XE/control02.ctl' scope=spfile;
-- shut the instance down and do not start it yet
shutdown immediate
Now copy the control files to the new location:
cp /opt/oracle/oradata/XE/*.ctl /var/media/oracle/oradata/XE/
And then start the database instance. Execute startup command for this as sys:
-- start the instance
startup
Done. Now the database uses four control files at a time – two on one hard drive and two on the other.
Multiplexing redo log files
The next step is to set up the second redo log files group on a different HDD. You can check the current status of your redo logs by querying the corresponding dynamic performance views:
select * from v$log;
select * from v$logfile;
As you see, you have three redo log groups of one file each of 200 MBytes by default. Let us add one more member into each group. For this, run the following commands in SQL*Plus as sys:
-- add one additional member on a separate disk to each redo log group
alter database add logfile member '/var/media/oracle/oradata/XE/redo01.log' to group 1;
alter database add logfile member '/var/media/oracle/oradata/XE/redo02.log' to group 2;
alter database add logfile member '/var/media/oracle/oradata/XE/redo03.log' to group 3;
You can notice that after adding the files they have INVALID status. This is normal, they become active (with blank status) on the first use. You can force it by invoking this command three times in a row in SQL*Plus as sys:
alter system switch logfile;
Ok, now the databases writes redo log records into two locations simultaneously. And this is what we wanted.
ARCHIVELOG mode on
By default, Oracle Database XE works in the NOARCHIVELOG mode. It means it is not protected from media failure and it would be impossible to fully recover database from a failure. Furthermore, even if we set up backups, it will be possible to restore the database only to the point of time when the backups were created.
But if we enable ARCHIVELOG mode, we will be able to recover our database to the most recent point of time, because in this case after restoring from a backup, it will be possible to recover the database to the current state using archived and current redo log files. Isn’t this awesome?
To check the current status of database log mode run the following command in SQL*Plus as sys:
select log_mode from v$database;
As you see, by default the database works in NOARCHIVELOG mode. Now prepare a directory for archive log files. Since I don’t have a different host for this, I will be using my second hard drive:
mkdir -p /var/media/oracle/oradata/XE/arch
chown -R oracle:oinstall /var/media/oracle
And then specify it as a destination directory for archive logs in SQL*Plus as sys:
alter system set log_archive_dest='/var/media/oracle/oradata/XE/arch' scope=both;
And check if it worked:
select * from v$archive_dest order by dest_id;
The first destination should be shown as VALID.
Now it’s high time to enable the ARCHIVELOG mode. For this start SQL*Plus as user sys and run the commands as following:
shut immediate
startup mount
alter database archivelog;
alter database open;
Note that if this is not a fresh installation of yours, you will need to perform a full backup after this operation, because all the previously created backups are unusable after changing the log mode.
Let’s check:
select log_mode from v$database;
Providing you see ARCHIVELOG, everything is ok. Now your database will archive redo log files to the specified destination.
Our database already looks quite reliable. But what’s next?
Backups
To be even more confident, we need a backing up strategy for our datafiles. There are several options when it comes to backup an Oracle Database. They are divided into two general classes – physical backups (RMAN, user-managed tools) and logical backups (expdp/impdb, exp/imp, user-defined DDL/DML SQL scripts).
Here we are going to consider managing backups using Recovery Manager (RMAN), because this is the most powerful and officially recommended option by Oracle. RMAN is a perfect addition to the steps we already made in the previous chapters when started to archive redo log files.
RMAN allows you to back up literally everything related to your database, including data, parameter, control and archived redo log files. There is also a huge number of options of how to manage backups with RMAN – they could be written to different media, they could be backup sets or datafile images, the backups could be full or incremental, and if such, then differential or cumulative, and so on.
In this particular article we are going to consider an easy, but still quite a reliable case, and we are going to do so deliberately – our backing up strategy will be to have up to two current copies of full, not compressed backup sets for our data and control files. We are going for the not compressed option since it is more performant and less CPU loading. We are also not going to use recovery catalog, since it is a little bit of a overkill for us. We chose full backups, because incremental backups do not give many benefits for Oracle Database XE (a full backup takes not that much time). But you are welcome to change this configuration for your particular case as you wish.
To start with all this, prepare a directory for the backups (again, I will be using my second drive mount point, for you it could be different):
mkdir -p /var/media/oracle/oradata/XE/backup
chown -R oracle:oinstall /var/media/oracle
Then, create a file where we will write RMAN commands to perform the backing up operation:
cd /var/media/oracle
touch make_backup.rman
mcedit make_backup.rman
And put these lines to the file in the editor:
# This is an Oracle Recovery Manager script to create a full backup of all data and control files
# The script expects an established connection to a target database
# For local target database, run `connect target /` before running the script if you use it manually

set echo on
run
{
  # set device configuration to default (disk with parallelism of 1)
  configure device type disk clear;

  # set channel configuration to default and then specify the destination file format for them
  configure channel device type disk clear;
  configure channel device type disk format '/var/media/oracle/oradata/XE/backup/data_%U_%I_%T.bk';

  # enable backing up of control files and specify the destination file format for them
  configure controlfile autobackup on;
  configure controlfile autobackup format for device type disk to '/var/media/oracle/oradata/XE/backup/cf_%F.bk';

  # set retention policy to 2 backups at a time
  configure retention policy to redundancy 2;

  # delete archive logs after 2 backups
  configure archivelog deletion policy to backed up 2 times to device type disk;

  # show the configuration before start
  show all;

  # perform backing up
  backup check logical database;

  # perform crosscheck to sync metadata with backup media data
  crosscheck backup;

  # delete obsolete and lost (not on disk anymore) archived redo log and backup files
  delete noprompt obsolete;
  delete noprompt expired backup;
  delete noprompt archivelog all;
}
Then save changes. As you see, the script is quite self explanatory. First, we perform some preliminary configuration, then run the backup command, and finally erase not needed anymore files.
To run the script we are going to create a shell script:
cd /var/media/oracle
touch make_backup.sh
mcedit make_backup.sh
And put these lines into it:
# Shell script to perform RMAN backup using prepared commands file
# The script expects that environment is set for user `oracle`
# The scripts runs RMAN client as user `oracle`, connects to local database and executes the specified commands file
# The output is written to the specified log file

su - oracle -c "rman target / cmdfile /var/media/oracle/make_backup.rman > /var/media/oracle/make_backup_last.log"
As you see, our shell script runs the preliminary written RMAN commands file as user oracle. This is important, because only this user is allowed to use bequeath connection method to the database instance (by default).
Now we need to tell the system to run the script periodically. To do so, add this line to /etc/crontab file:
0 3 * * 1 root /bin/sh /var/media/oracle/make_backup.sh
Mind the fact that there must be a new line character at the end of a line in crontab. Otherwise, your task will not be executed.
This enables weekly backups at 3:00 AM every Monday.
That is it! To create a backup immediately, just run the script as user root as following:
. /var/media/oracle/make_backup.sh
Now, if a catastrophe occurs, the only two RMAN commands which you need in order to recover your database are restore database and recover database. You also have options to restore a particular datafile. Or even a particular corrupted block, however for this you will need Block Media Recovery, which is a paid option, unfortunately still not included with the XE.
Steps which we completed here are generally enough for most cases. But if you like to know more about other options, refer to the official Backup and Recovery documentation.